Personalizing Your Invoice Capture Screen
When you open a document in DOKKA, the Invoice Capture Screen appears.
This is where you can view, edit, and capture all the invoice data before publishing it to your accounting system.
On one side of the screen, you’ll see the uploaded invoice image, and on the other side, the capture fields — displayed according to the accounting or ERP software DOKKA is connected to.
DOKKA allows each user to customize the capture screen layout to fit their personal workflow and preferences.
Managing Header-Level Fields
At the top of the screen, you can rearrange the header fields by clicking the "Customize Form" button- see the screenshot below:
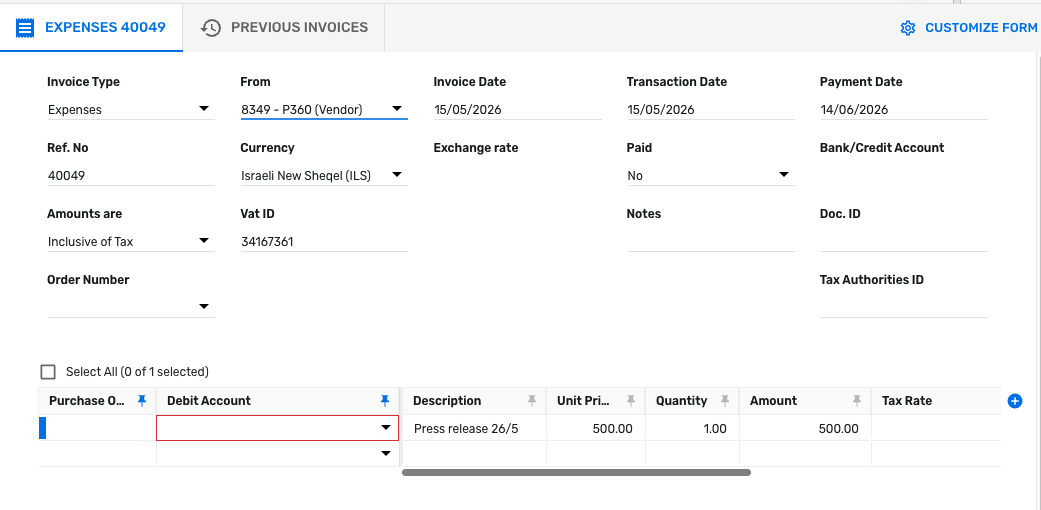
In the window that opens, you will see all the fields currently displayed in the header, in the exact same order they appear on the screen.
Fields marked with a blue star: Mandatory fields that cannot be removed from the display.
Fields without a blue star: Can be removed by clicking the eye icon next to each field.
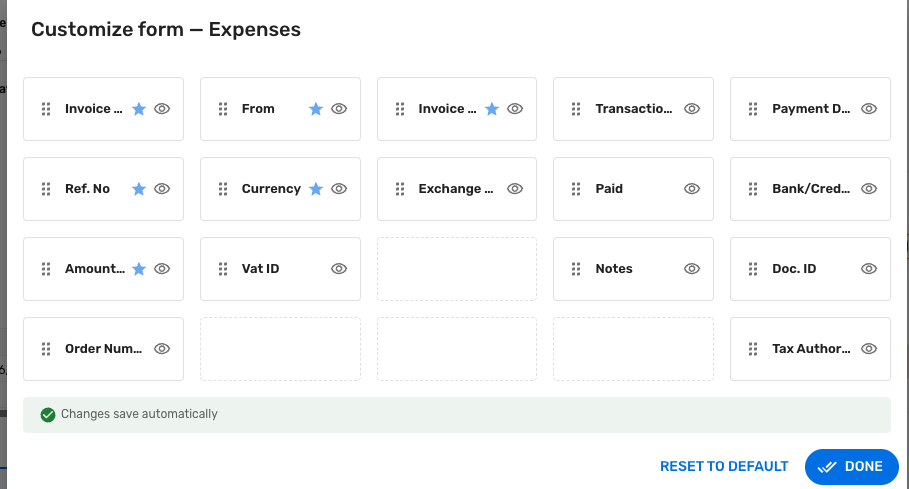
To change the order of the fields, click and hold the dots icon next to any field, then drag it to your desired location. If you wish to reset all fields to their original positions, you can click the "Reset to Default" button. Once you have finished making all changes, click the "Done" button.
Managing Line-Level Fields
Next to the line-item fields, you’ll find a blue plus (+) icon.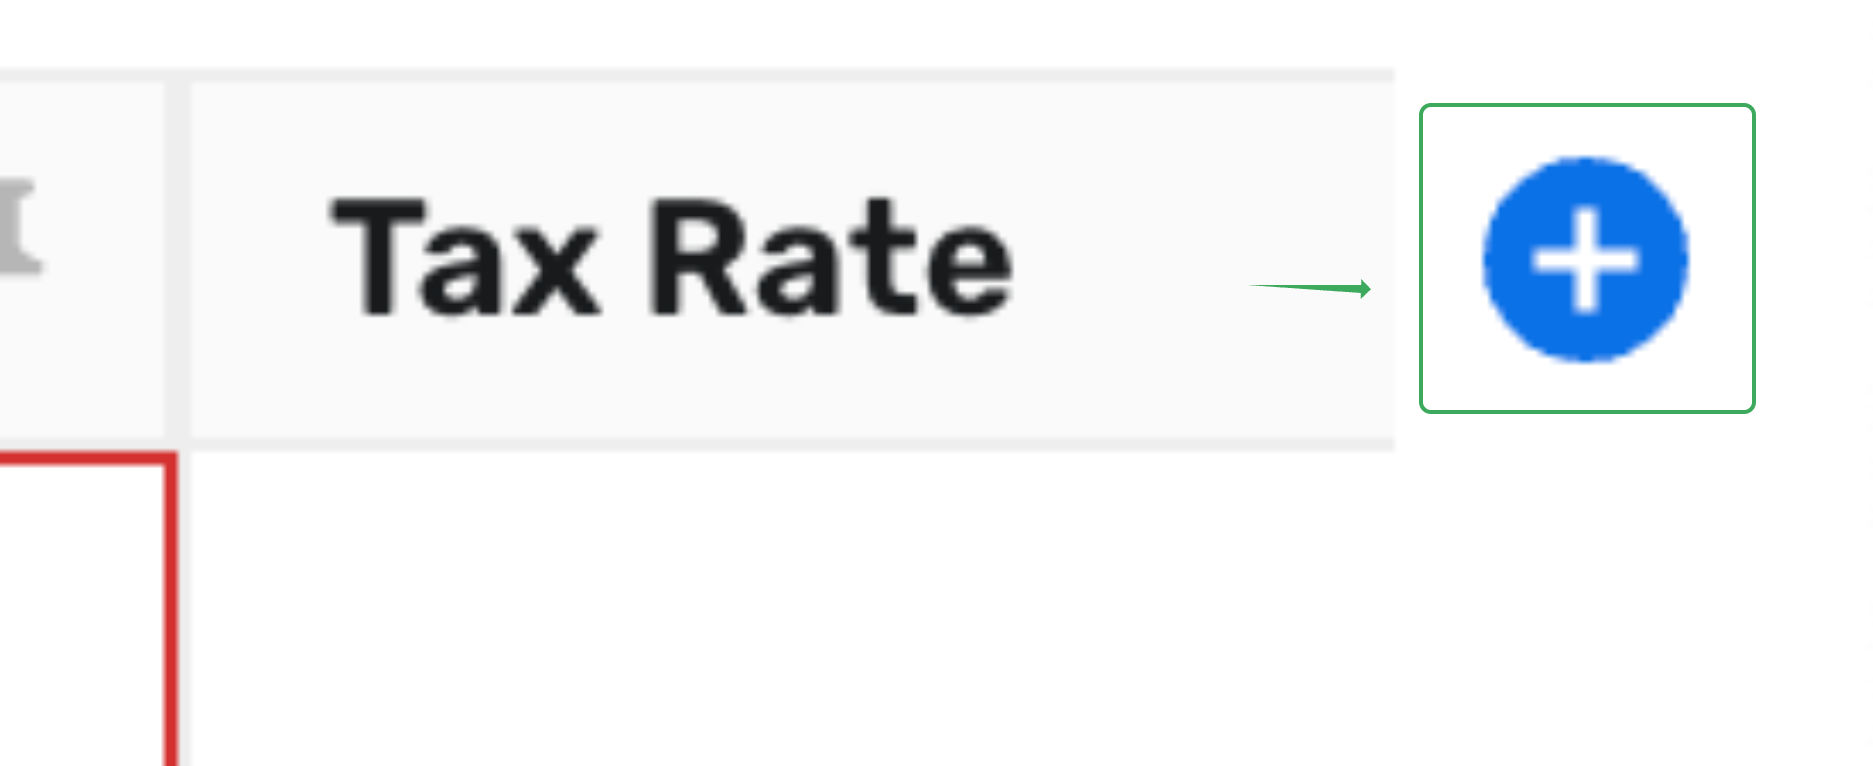
Clicking it opens a list of all available fields at the line level.
In this window, you can add, remove, or rearrange fields as needed.
Blue button: active fields that can be removed.

Gray button: inactive fields that can be added.

Light-blue button: default system fields that cannot be removed.

Rearranging Field Order
You can reorder the fields by dragging them up or down using the small line icon next to each field.
This determines how the fields are displayed in the capture line.
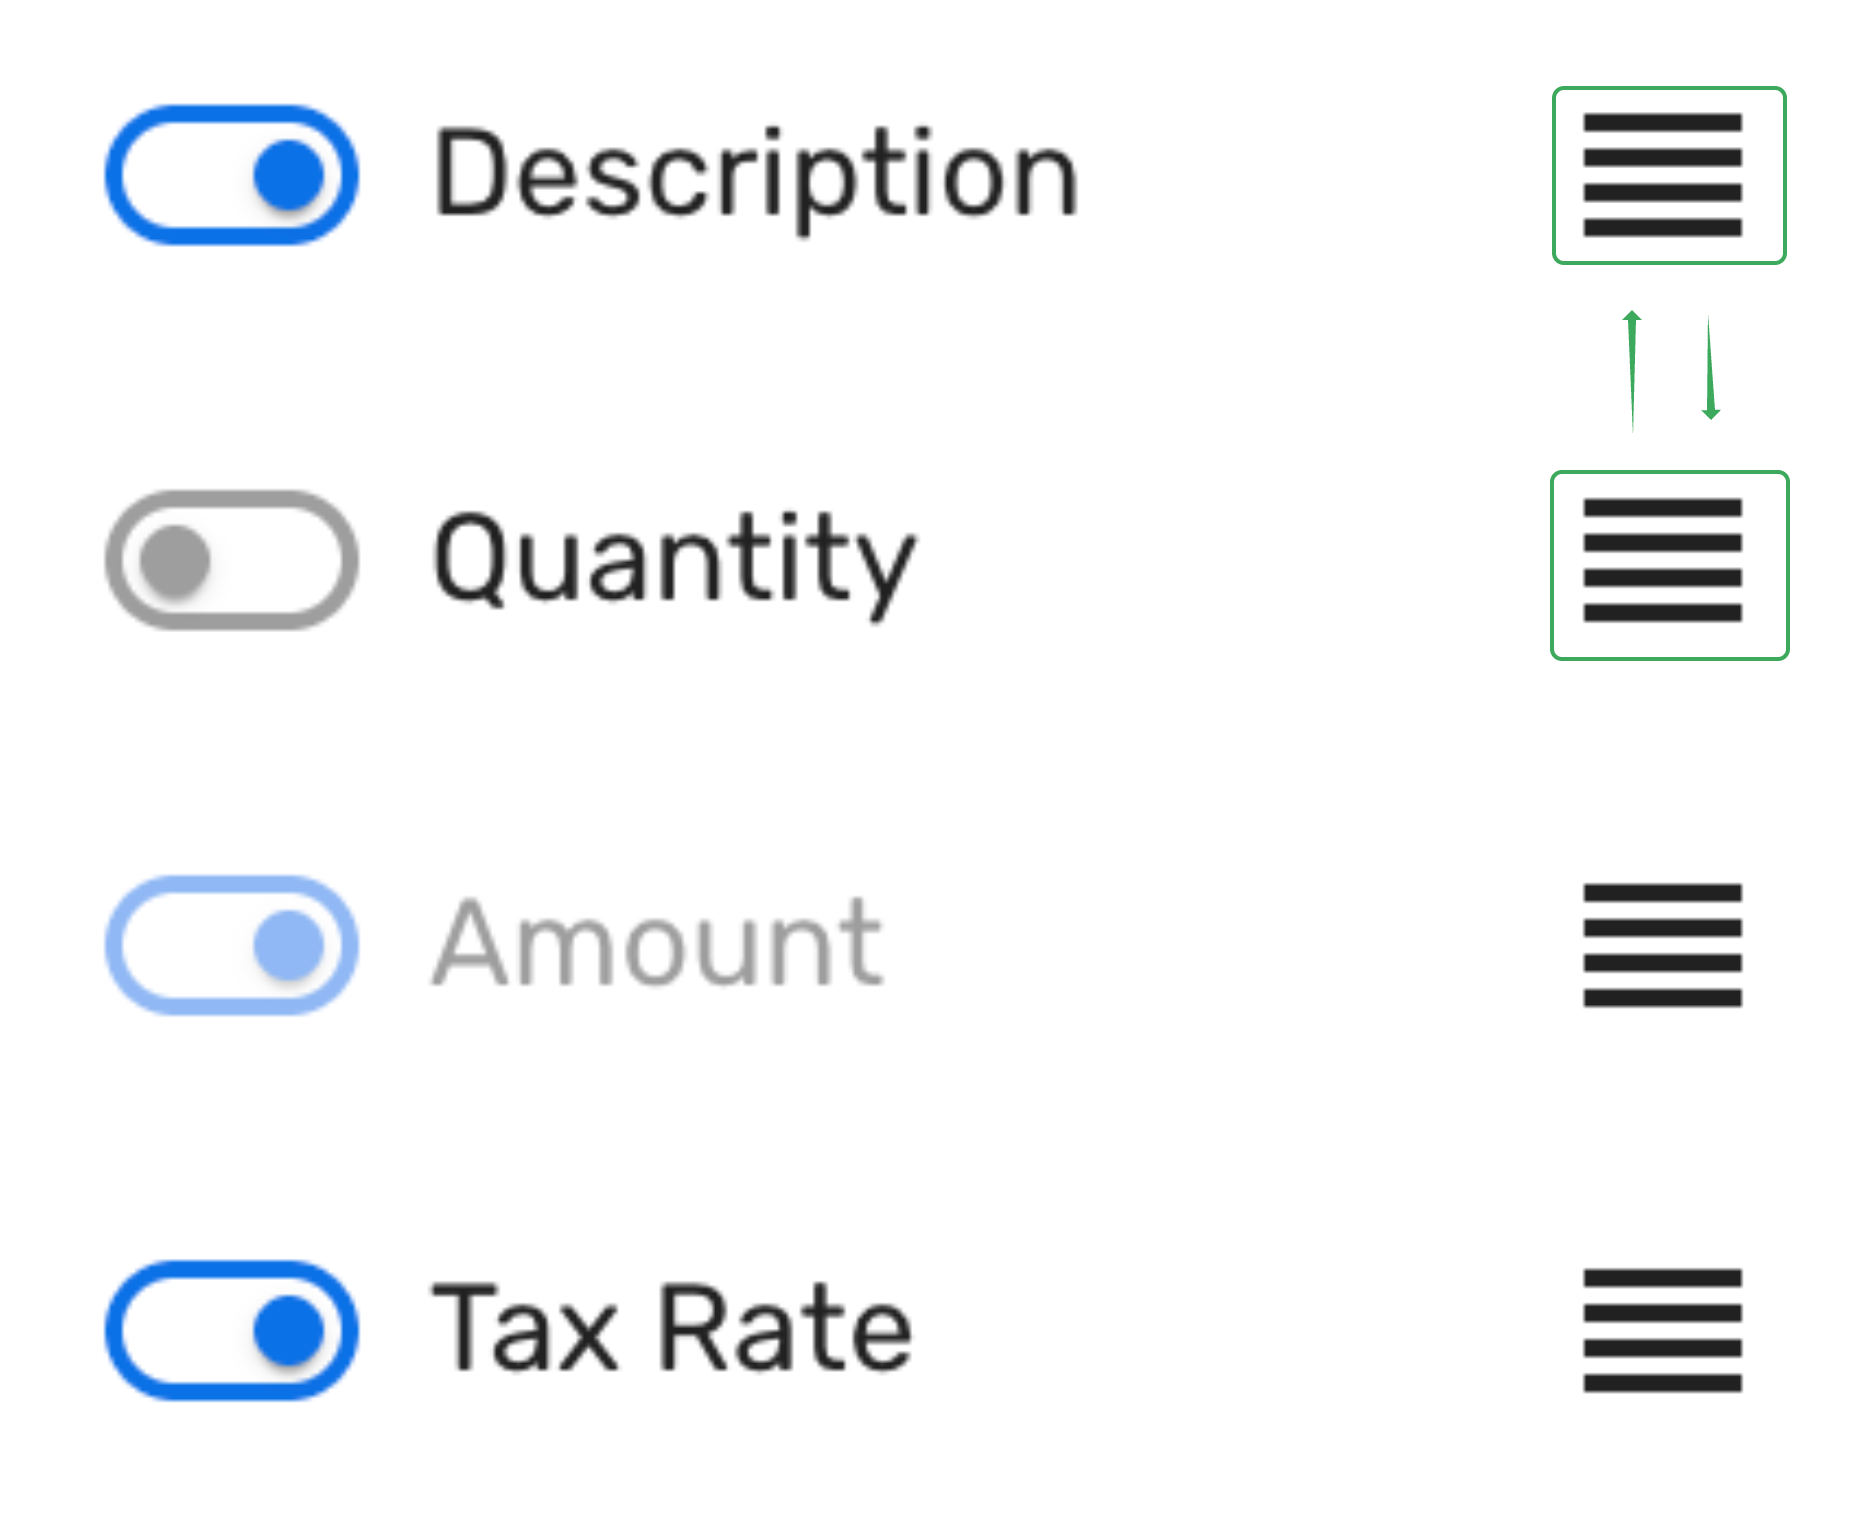
Note: Some fields (those at the top of the list) cannot be removed or moved.
Any customization is saved per user and per company, allowing every user to work in their preferred layout.
Adjusting Field Width
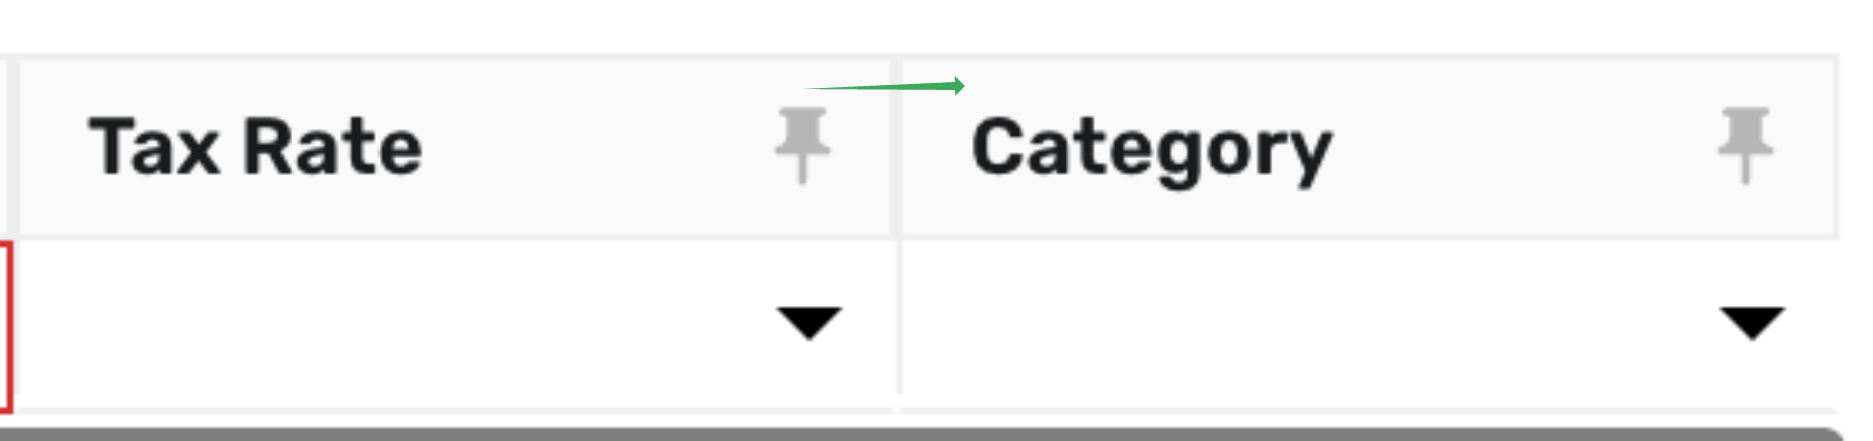
The capture fields work similarly to Excel columns — you can expand or shrink them by dragging their borders sideways.
Simply hover over the dividing line between fields and drag right or left until you reach the desired width.
Changing the Screen Layout
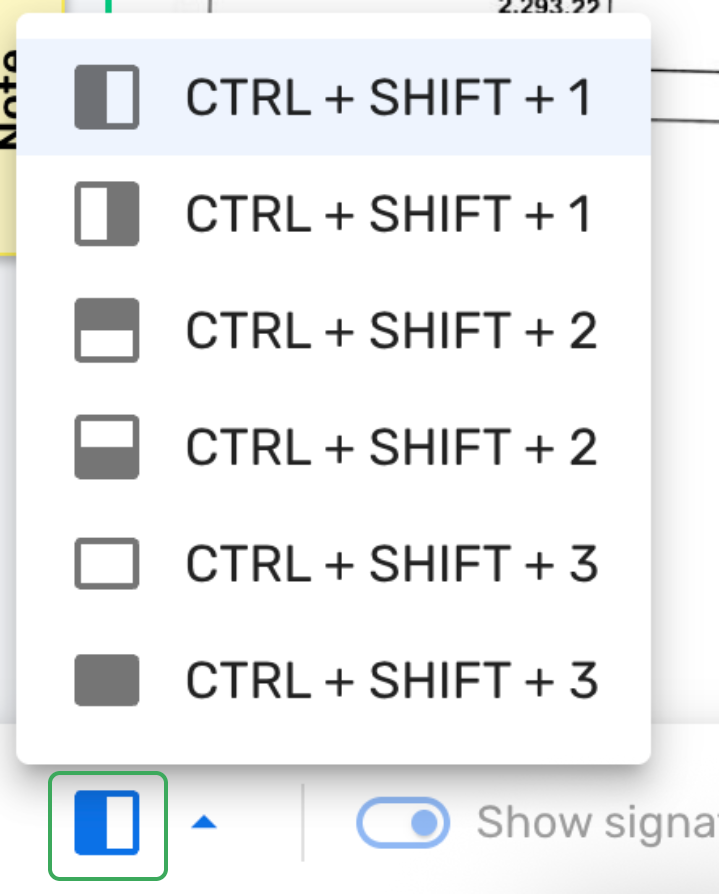
You can choose how the invoice image and capture fields are displayed on your screen. For example:
Invoice on the right, capture fields on the left
Invoice on the top, capture fields below
Capture fields on the top, invoice below
To change the layout, click the layout icon in the bottom-left corner of the screen and select the view that works best for you.
This customization flexibility helps every user work comfortably and efficiently, keeping their screen organized exactly the way they like it.
Was this article helpful?
That’s Great!
Thank you for your feedback
Sorry! We couldn't be helpful
Thank you for your feedback
Feedback sent
We appreciate your effort and will try to fix the article